My New Hive

In my last post, I told you about my new interest in beekeeping. Since then, I’ve been attending classes, reading pretty much everything I could get my hands on, and watching hours and hours of YouTube videos. I was also looking for a place to put a hive. I asked around at every community garden and they either already had hives or didn’t want any. My determination finally paid off when I met someone who has a friend who wanted a hive.

So I contacted her and she agreed to let me put it on her roof! So I sprang into action and started making a list of everything I need and ordering the woodenware and tools. I had NO idea there were so many choices to be made about hives. You not only need to know what type of hive (I decided on a Langstroth which is probably the most common one) and then the number of frames (8 or 10), how may hive boxes, the type of bottom board and on and on. I’ll be discussing more of these parts in future posts.

And because I never make things simple, I had to assemble all the pieces myself. There was lots of hammering involved (and I can proudly say I only hit my thumb once). Then I went to Home Depot to get paint. I decided on lavender because, well, lavender. Then I faced my biggest hurdle: getting bees.

I wanted to get package bees, but when the order was put in, I didn’t have a place for my hive yet. Usually people order bees early in the year so by the time spring comes around, a lot of places are sold out. I was so sad, but I didn’t give up. Instead, I pulled a “Field of Dreams” and decided to set the hive up anyway. Eventually I found someone and he delivered the bees a couple of days ago.

By the time the bees got here, the sun was going down (and it was raining) so I just put them into the hive as quickly as I could since they don’t like wet or dark weather and they’d already been cooped up in a box.  I was able to take a few pictures. They’re not great, but at least I have pictures of the day I started my first hive.

So, here’s it is. The white box in front is the nuc box that the bees arrived in. There were a few bees that didn’t want to leave, so I left it there so they could make their way into the hive when they’re ready.

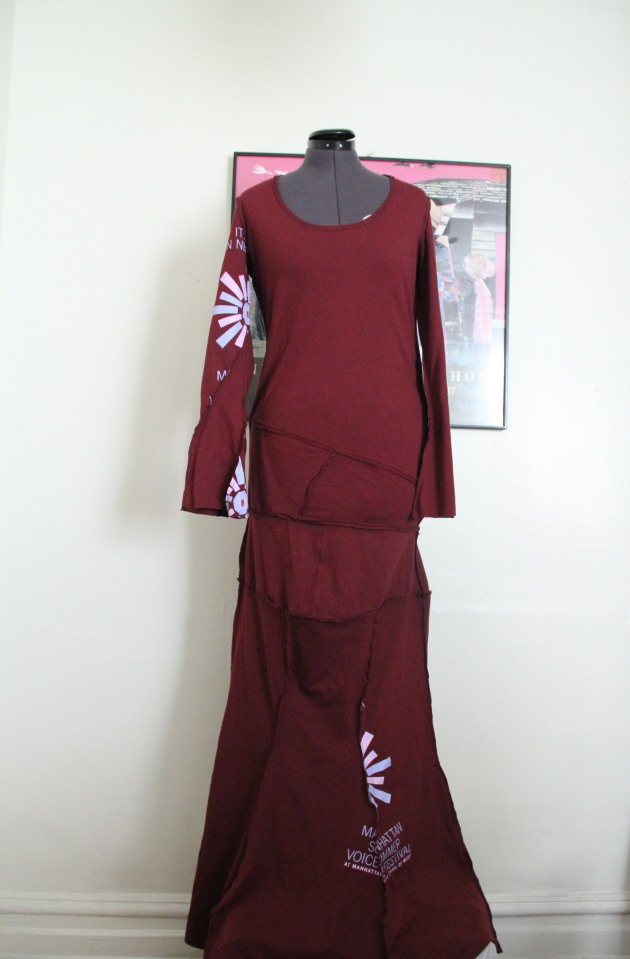
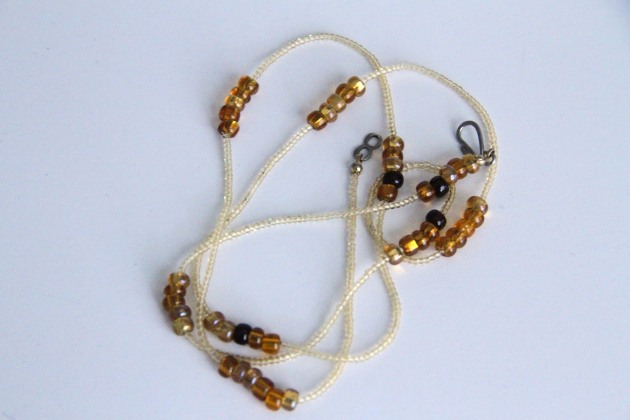
Aside from working, I haven’t been doing much with my hands lately except make a set of mala beads. I haven’t even turned on my sewing machine in months even though I have a bunch of items on my list. The weather has been pretty cool/cold/rainy, so I haven’t needed any summer dresses, but I’ve been keeping my eyes open for pretty fabrics because I know I can whip up a maxi dress in a few hours if I need to.

I’m trying to find some balance because I know I get very unhappy when I’m not being creative. I may have to schedule time to work on my projects instead of waiting for the magic combination of time and inspiration. My creative work deserves as much, if not more, attention than any work I do for other people. I have to remember that.

Anyhow, I’m going to do an inspection on Saturday, so I’ll take better pictures then. I just need to figure out how to focus while wearing my veil.

xoxo,


Bees!

Since we last spoke waaaaaay back in 2016, I’ve taken up a new hobby – beekeeping!

I had my first class last Saturday at Randall’s Island. I’ve lived most of my life in NY, but that was my first time on Randall’s Island and it’s really quite beautiful, if a bit isolated.

The class was informative and fun. I learned so much about our bee friends and how to build and maintain a hive. We also spent some time inspecting the hives on the roof of the building. Since it was chilly, we didn’t open any of the active hives, but we did look at some of the “unoccupied” ones. We’ll do another inspection later this month and in April, we’ll get the bees that will populate the hive this spring/summer. The new bees are being driven in from California. They’re fancy like that.

The whole process of beekeeping is fascinating. From how to choose a queen, to the division of labor in the hive, to how they build those elaborate honeycombs and produce honey. And they’re peaceful unless they feel threatened. I wish I’d known that bees are friendly because I spent most of my childhood running from any and all flying insects. In my defense, I grew up in Brooklyn so I considered insects wildlife.

Of course we also went over the dangers. A bee sting will be unpleasant to most people, but if you’re allergic, it could kill you. I’ve never been stung, but I doubt I’m allergic. I will, however, have to find out. I love honey, but not enough to die for it.

Speaking of which, a hive provides about 20lbs of honey so I was totally excited by the prospect of having alllll that honey –  from my own bees no less. I just need a place to build my hive. I’m pretty sure it’s going to be a big, fat NO from my landlord so I have to find somewhere else.

I took quite a few pics, but for whatever reason, I can’t upload them. I will post them as soon as I can though.

xoxo,

Blog signature

Deconstructed

I’ve been having difficulty finding comfortable things to wear around the house that don’t make me look like Bummy McBumerson. In my head, I wear really lovely robes with marabou slippers. In reality, I’m in t-shirts and leggings or jeans. So I challenged myself to make something that I can wear at home that’s an upgrade but still comfy enough that it doesn’t feel too precious to wear. I also wanted something that I can throw a jacket (soon to be a coat) over and go out. Once I knew what I was going to do, I also knew I wanted it to look deconstructed and have have minimal waste. Et voila, I came up with this dress (it looks much better on me than on my dressform, especially since I my torso doesn’t just end suddenly).

img_3212

I made it with some t-shirts I bought for $.99 each at a thrift shop last year. I think they were leftovers from the summer program at the Manhattan School of Music. Anyway, I originally intended to make them into an A Chanin dress. But since they’ve just been sitting in a bag and I’m still on a no-buy until I work through most of my stash, I used them for my experiment.

For the base pattern, I used the much beloved (and spectacularly simple) M6886, but tweaked it a bit because I wanted a flared maxi-length skirt and bell-ish sleeves. I drew the new pattern free hand onto the t-shirts and just patched it together as I went along.

img_3220

My seam allowance was about 1/2″, but I trimmed all the seams down to 1/4″ once I was finished. I thought about serging them, but I like how they look raw.

And I FINALLY used one of the decorative stitches on my machine. I really don’t know why I waited this long.

img_3219

I love that it’s going to get softer the more I wash it. And I look forward to making more comfy “home” clothes with old t-shirts.

This dashiki skirt I made over the summer. It’s too old to warrant it’s own post, but I think I mentioned it at some point so here it is.

img_3207

I used a different method to install the zipper. Instead of just putting the pockets inseam, I used this really clear tutorial to add the zipper to the pockets.

img_3210

I’m not sure what I’m going to work on next. Right now, I’m just glad to be working with my hands again.

xoxo,

Blog signature

Back – again! This Time With Beads!

It’s been a long time. I shouldn’t have left you.

So, let’s catch up shall we? Since my last post, I’ve only done very little sewing (one skirt to be exact) and I’m still working on my French jacket, but mostly I’ve been just taking it easy, enjoying my summer and dabbling in jewelry.

As you know, I get obsessed with something and then go all in. Here’s my newest obsession: waistbeads (the sun was playing peekaboo, but I did the best I could with the pics.)

img_2724

I made some from rose quartz and amethyst a few years ago, but the clasp came off so they were buried in my jewelry box. Recently I became interested in repairing them. Then I started wanting more. Then I went on Etsy and bought new beads to mix with the beads I already had and I’ve been making new sets ever since.

You can find waistbeads made from plastic or glass beads fairly easily, but I knew I wanted mine to have gemstones because of their healing properties (I’m about that “good energy” life). I also wanted certain colors.

So after I restrung my first set (and while I was waiting for my Etsy order), I made these from glass seed beads and some amber-colored beads I bought at Michaels:

img_2751

These are turquoise chip and green glass beads. I might redo this one. IDK, I feel like it’s too green:

img_2740

I made these from citrine beads I got from Etsy, with glass beads, and seed beads I had on hand:

img_2742

img_2741

These are jade, tiger’s eye, garnet and brass:

img_2749

I have a hank of those yellowish glass beads so I’m going to experiment with multistrands next.

I also got a lot of work done on my black Alabama Chanin skirt. It’s still not finished, but at least I can see the light at the end of the tunnel.

As for the only skirt I sewed over the summer, I have to take pictures of that tomorrow when the sun returns.

That’s all for now, but since summer’s over, I plan on visiting with you more often. So, do tell, what have you been up to?

xoxo,

Blog signature

Adjusting Sleeve Lift on My French Jacket

So in my last post I talked about finally finishing my French jacket (or my Faux-nel jacket as I call it). I really tried not to nitpick, but, well, I just can’t let some things go. I keep pinning and marking it up because every time I fix one thing, I see something else. It’s been a struggle to get it to fit the way I want. The main problem areas are the shoulders and sleeves.

First, the shoulder seam is too long. It was about an inch past where it should’ve ended. So that had to be adjusted. That was the easy part.

The sleeves have been giving me the blues since the beginning. I have NO idea why the Big 4 pattern companies make armscyes large enough to hold a toddler, but that’s also my problem with V8804, the Claire Shaeffer pattern I’m using. Not only is the entire underarm baggy, I couldn’t lift my arm at the shoulder without the entire jacket moving. I could only raise my forearms comfortably and it made me feel like a T-Rex.

Enter Threads Magazine. (If you don’t have a subscription, you need one. Seriously.) They always have a bunch of sewing articles that I read and say “Interesting, but when is that ever going to come in handy?” Well finally that day came. I recently read an article about sleeve lift (basically the amount of mobility your sleeve allows when you lift your arm), but I couldn’t remember which issue it was in. Luckily the Google machine works 24/7 so I tracked it down.

My friend-in-my-head Kenneth King wrote a pretty detailed article about how to adjust a pattern or muslin to make the sleeve fit better. It’s counterintuitive, but to make the sleeve fit better, it needs to have LESS room, not more.

For whatever reason I can’t embed his video, but here’s the link explaining the theory behind making the armscye smaller.

He offers three solutions: 1. Add ease throughout (lower the armhole and extend the biceps line of the sleeve); 2. Reduce the sleeve cap height; or 3. Raise the armhole.

I chose number 3 because it seems like the best solution for the silhouette of this jacket. And according to KK, it results in a “Chanel-like sleeve with a high underarm and a relatively slim sleeve with maximum lift” which is exactly what I wanted.

So that’s the alteration I’m doing now. There’s a side panel instead of a side seam so I taped the pieces together so I could just draw one curve.

IMG_2382

I added about 2-1/2 inches to the side panel (number 8) and tapered the line off to the other two pattern pieces. The red ink is to fix a line that wasn’t curvy enough.

IMG_2384

Here are the finished pieces with seam allowance added to the side front and side back.

IMG_2385

The other adjustment I’m working on is lengthening the sleeves because I’m just not a fan of bracelet length. Even when I was trying on the muslin, I just couldn’t get past how odd they look. So I added 5 inches so that the finished sleeve will end at my knuckles. And I’m going to flare them out a so they look like the ones from Tracey’s jacket below (the picture is from A Challenging Sew’s blog. Read the entire post here. Actually, go read the whole blog; she’s pretty amazing.)

I’ll be making yet another muslin tomorrow to fine tune the sleeves. Hopefully it’ll be my last and I can start cutting it out soon.

xoxo,

Blog signature